


Vaucluse Backpack Ventilation Gear
Zpacks x Vaucluse Gear - Max Ultralight Backpack Ventilation Frame + Sleeve
Zpacks x Vaucluse Gear - Max Ultralight Backpack Ventilation Frame + Sleeve
Couldn't load pickup availability
The Vaucluse Ventilation Frame + Sleeve is the lightest way to give your backpack that “ventilated back panel” feel. This design uses Vaucluse’s patented airflow frame concept to create a gap between you and the pack, helping dissipate heat and eliminate clammy, soaked backs after long, humid trail climbs.
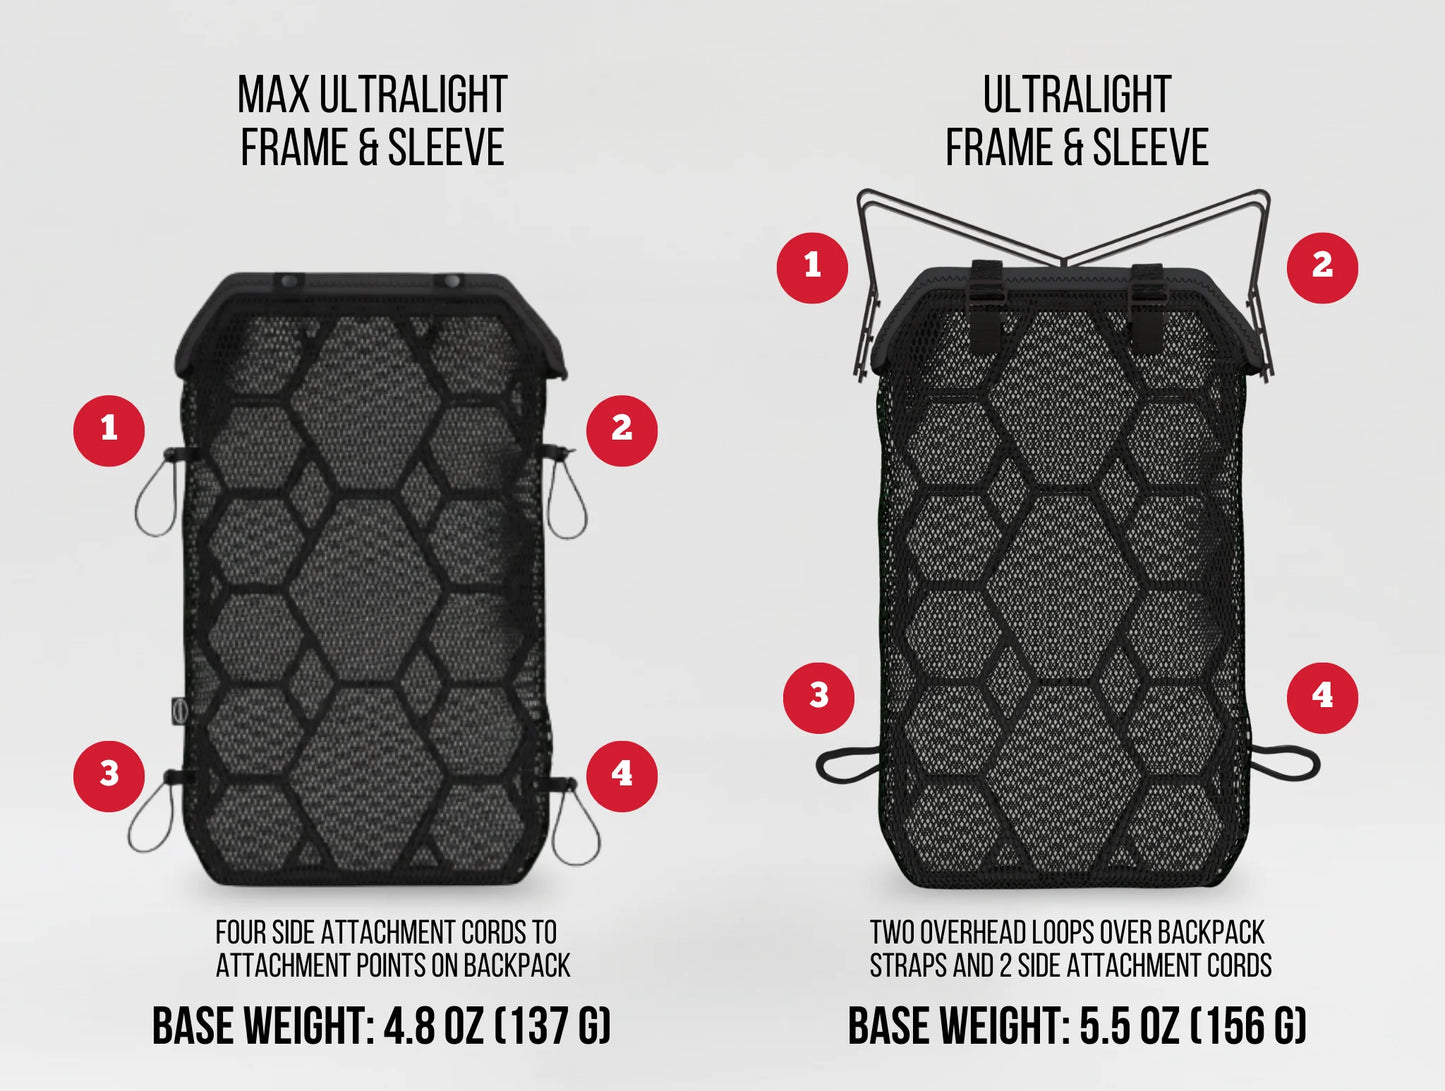
This ventilation frame features a universal attachment system designed specifically for ultralight backpacks or any backpack that has attachment points on the sides. The four corners of the included sleeve secure to any four points on your backpack and can be adjusted up or down to find the perfect location.
This 2.0 version differs from our 1.0 version frame by not having the overhead loops which go around the backpack's shoulder straps. The attachment system is through the four attachment points on the sides. As a result, this 2.0 frame is 7 ounces lighter.
The Vaucluse Ventilation Frame delivers a “moves-with-you” comfort that keeps you cooler, drier, and more comfortable, making it a cult favorite.
Features:
-
Reduces sweat and increases airflow
- Frame comes in one size (universal design)
-
Supports loads over 100lbs
-
Fits packs 15L and larger
-
Cushioned mesh for added comfort
-
Lightweight (5.5 oz / 153 g)
-
Proudly made in USA
-
Made from recyclable, non-toxic materials
- Lifetime warranty
Specs:
-
Dimensions: 14.5" tall x 8.5" wide x 1.25" deep (36.8 cm x 21.6 cm x 3.2 cm)
-
Weight: Frame - 3.0 oz (85g)
-
Sleeve: 1.8 oz (52g)
-
Ventilation Gap: 0.75" / 1.9 cm
- Load Capacity: 150 pounds (68 kg)
Compatibility note: This frame and sleeve are designed for ultralight backpacks and are compatible with most 15L+ packs with side attachment points.
Before you start: The frame arrives already installed inside the sleeve. It can be removed for washing the sleeve. The sleeve has two different mesh faces: a cushioned side (for comfort against your back) and a thinner side (for maximum ventilation). Most people position the cushioned side against their back, but it can be used in either orientation.
Choose your ride height: Put the loaded backpack on and decide where you want the frame to sit. Most hikers prefer the frame in the upper to upper-middle back area.
Attach the corners: Identify four attachment points on your backpack that the corner cords will reach. If the included cords aren’t long enough, use zip ties or tie loops to extend the cords.
Pinch each springless cord lock until the holes line up, and run each of the four cords through them.
The frame position can be fine tuned up or down by adjusting the four corner cords.
Put the pack on, walk around, and make small re-adjustments as needed.
Using a different backpack?
If your pack’s attachment points don’t line up well with the sleeve cords, you can also secure the frame using zip ties, with or without the sleeve.